As a WordPress developer, if you want to add something worth learning with your WordPress skills then WordPress Customizer should be on top of your list.
What is WordPress Customizer ( The Customize API )
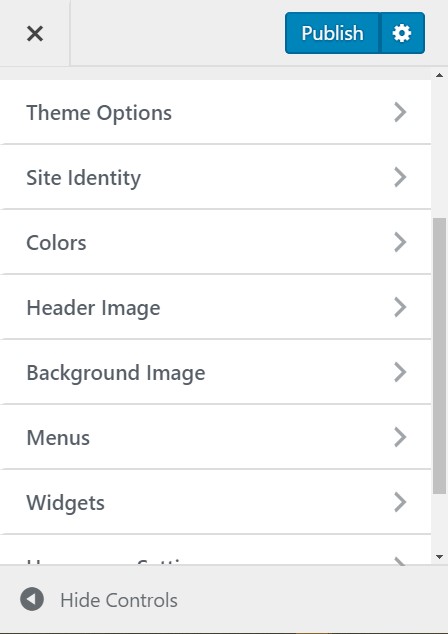
The customizer is an interface that WordPress provides under Appearance > Customize in the WordPress admin, that allows WordPress users to customize their website based upon the given options, and see those changes in the live preview mode.
Customizer works with Customize API, The customize API allows WordPress developers to create or add different customization options, for their themes and plugins, to the users.
Let’s dive into the Customize API, and start learning some great stuff with WordPress customizer.
Customizer Objects
The Customize API provides four main customizer objects: Panels, Sections, Settings, Controls. You can use these objects to create or modify options in the WordPress customizer or customize screen.
- Panels – Panels act like a container for sections. A panel can have multiple sections together.
- Sections – Sections are the container for controls, A Section can have multiple controls together.
- Settings – Settings handles live preview, sanitizing and saving the data for the customizer object.
- Controls – Controls are the input fields or UI elements that work with settings. Some of the common controls are: text, textarea, select, checkbox, radio, etc
customize_register – The Customizer Hook
To add, remove or modify panel, section, setting, control, and any options with the customizer, you have to use customize_register hook.
This hook allows you to access the Customize Manager WP_Customize_Manager class through $wp_customize object.
This WP_Customize_Manager class controls the customizer screen and objects.
// Add Custom Options With Customizer

function diwp_theme_customize_options( $wp_customize){

// Write code to add & modify panel, section, settings, controls

}

add_action( 'customize_register', 'diwp_theme_customize_options' );
The above code is an example of adding options to the customizer screen with customize_register hook.
Now let’s see how you will add panels, sections, settings, and controls to create options for your theme or plugin.
Add Panel in WordPress Customizer
To add a panel with WordPress customizer, the customizer API gives a function.
// Function To Add Panel in Customizer

add_panel( $id, $args );
Note: To add panels, there should be at least one section in that panel, and in that section, there should be one control to be displayed.
To add a panel with add_panel() function, you have to pass a few parameters and arguments, these parameters and arguments will help you to create a custom panel. these parameters & arguments are given below:
Parameters:
- $id: It refers to the ID for the panel, it’s required and it should be a string.
- $args: It refers to an associative array of arguments for the panel. Here are the list of accepted arguments for the panel:
Arguments:
These arguments should be passed inside the associative array $args.
- title: (Required), this refers to panel title or panel name.
- description: (Optional), this refers to the description for the panel, the panel description will be displayed when you click on the help icon at the top of the panel.
- priority: (Optional), this sets the priority or the order for the panel to appear in the customizer screen. Default: 160, and it will add the panel or section just above the Additional CSS section.
- capability: (Optional), this allows you to show or hide the panel based upon the user roles and permissions. Default: edit_theme_options
- theme_supports: (Optional), this allows you to show or hide the panel based upon if a theme supports a particular feature provided by add_theme_support or not.
- ‘theme_supports’ => ‘title-tag’ :- It will hide the panel if a theme doesn’t support ‘title-tag’
- active_callback: (Optional), this allows you to show or hide the panel based upon the current page in the preview screen.
- ‘active_callback ‘ => ‘is_front_page ‘ :- this will only show the panel, if the current page in the preview screen is the front page.
Example:
Remember, this is not complete code to add panel with customizer, as I said earlier in the post, panel needs one section, and one control to display. This is just a preview of code to add panel.
 // A Code Preview to add panel:

 $wp_customize->add_panel( 'diwp_option_panel', array(

			'title' => 'DIWP Options',
			'description' => 'DIWP Options help you to customize your site.',
			'priority' => 0,
			'capability' => 'edit_theme_options',
			'theme_supports' => '',
			'active_callback' => ''
));
Add Section in WordPress Customizer
To add a section within WordPress Customizer, WordPress provides a function:
// Function To Add Section in Customizer

add_section( $id, $args );
Note: You can directly add a section to the customizer without adding a panel for it. A panel must have a section, but it’s not necessary to have a panel for that section.
Again, To add a section with add_section() function, you have to pass a few parameters and arguments, these parameters and arguments will help you to create a custom section with customizer. these parameters & arguments are given below:
Parameters:
- $id: It refers to the ID for the section, it’s required and it should be string
- $args: It refers to an associative array of arguments to define the section.
Arguments:
These arguments should be passed inside the associative array $args.
- title: (required), this refers to the section title or section name.
- description: (optional), this refers to the description for the section, the description will be displayed inside the section at the very top.
- panel: (optional), this refers to the panel, if you want to set this section to be inside the panel, then you can pass the panel id here eg: ‘panel’ => ‘your-panel-id’
- priority: (optional), this will set the order for the section based upon the priority along with other sections.
- capability: (optional), this allows you to show or hide the section based upon the user roles and permissions. Default: edit_theme_options
- theme_supports: (optional), this allows you to show or hide the section based upon if a theme supports a particular feature provided by add_theme_support or not.
- ‘theme_supports’ => ‘title-tag’ : It will hide the section, if a theme doesn’t support ‘title-tag’
- active_callback: (optional), this allows you to show or hide the section based upon the current page in the preview screen.
- ‘active_callback ‘ => is_front_page ‘ : this will only show the section, if the current page in the preview screen is the front page.
- description_hidden: (optional), this will hide the description for the section behind the help icon, so if you want to hide the description, you can set this to be true. Default: false.
Example:
this is just a code preview to add section with customizer.
// A Code Preview to add section:

 $wp_customize->add_section( 'diwp_general_option_section', array(

			'title' => 'Theme Options',
			'description' => 'DIWP Theme Options will override the default option',
			'panel' => 'diwp_option_panel',
			'capability' => 'edit_theme_options',
			'theme_supports' => '',
			'active_callback' => '',
			'description_hidden' => false
 ));
Add Settings With WordPress Customizer
In the customizer, Settings and controls work together. To add a setting, the function is :
// Function To Add Setting for controls

add_setting( $id, $args );
Parameters:
- $id: It refers to the ID for the setting, it’s required and it should be string
- $args: It refers to an associative array of arguments to define the setting.
Arguments:
These arguments should be passed inside the associative array $args.
- default: (optional), this refers to the default value of its associated control.
- type: (optional), this defines the type of setting, accepted values are: theme_mod | option, Default: theme_mod.
- theme_mod: is the default type of setting that stands for theme modification, so if you are adding theme specific settings or settings that control a theme then you can go with theme_mod
- option: is another type of setting that stores the value of controls in the options table in the WordPress database. So if you are adding settings for WordPress or any plugin that are not theme-specific then you can go with option.
- transport: (optional), this defines how the live preview should display or how the changes should be updated. Default: refresh, accepted values: refresh | postMessage.
- refresh: refresh is the default mode of transport or updating the setting value. This will refresh or reload the page in the live preview window of the customizer to display any changes.
- postMessage: this displays the changes without refreshing the page in the live preview window, but for that, you have to write some custom javascript to control the preview and display changes in the live mode. I will explain this later in the post how to do that.
- capability: (optional), this allows you to show or hide the setting based upon the user roles and permissions. Default: edit_theme_options
- theme_supports: (optional), this allows you to show or hide the setting based upon if a theme supports a particular feature provided by add_theme_support or not.
- ‘theme_supports’ => ‘title-tag’ : It will hide the setting, if a theme doesn’t support ‘title-tag’
- validate_callback: (optional), name of the function that will validate the setting.
- sanitize_callback: (optional), name of the function that will sanitize the data before submitting to the database.
- sanitize_js_callback: (optional), name of the function that will sanitize the data before outputting JS code.
Example:
// A code preview to add setting for control

 $wp_customize->add_setting( 'diwp_site_title', array(

			'default' => 'Dive in WP',
			'type'	  => 'theme_mod',
			'transport' => 'refresh',
			'theme_supports' => ''
 ));
Add Controls With WordPress Customizer
Controls are the input elements that work with its associated setting to modify theme options within the customizer.
WordPress comes with several different core controls that you can use. However, you can also create custom controls by extending the wp_customize_control class to recreate your own custom control.
To create control, the customizer API has a function:
// Function To Add controls

add_control( $id, $args );
Parameters:
- $id: It refers to the ID for the control, it’s required and it should be string
- $args: It refers to an associative array of arguments to define the control.
Arguments:
These arguments should be passed inside the associative array $args.
- label: (optional), this will set the label for control.
- description: (optional), this will set the description for the control.
- section: (required), this defines, in which particular section this control should display.
- priority: (optional), this will set the order for the control.
- type: (optional), this defines the control’s type. It can be text, textarea, email, url, number, radio, checkbox, select, color, etc
- capability: (optional), this allows you to show or hide the control based upon the user roles and permissions. Default: edit_theme_options
- input_attrs: (optional), this allows you to add attributes for the input control.
Example:
// A code preview to add control

 $wp_customize->add_control( 'diwp_site_title', array(
			'label'   => 'Site Title',
			'description' => 'Add Title For Your Site',
			'section' => 'diwp_general_option_section',
			'type' => 'text',
			'input_attrs' => array( 'placeholder' => 'Enter Site Title' )
 ));